Comparing Rust Libraries for ROS Nodes

While looking for guest speakers for the Cloud Robotics Working Group, I came across roslibrust, which is a package for building nodes in Rust that can communicate with ROS. Given how different the approach is from ros2rust, I decided to make a few simple nodes in both libraries to see how they compare. This post compares the two libraries by writing the same application in each.
This post is also available in video form. If you'd prefer to watch, click the link below:
Rust in Robotics
My previous post on building a ROS 2 Rust node goes into some depth on this - take a look at the post in question.
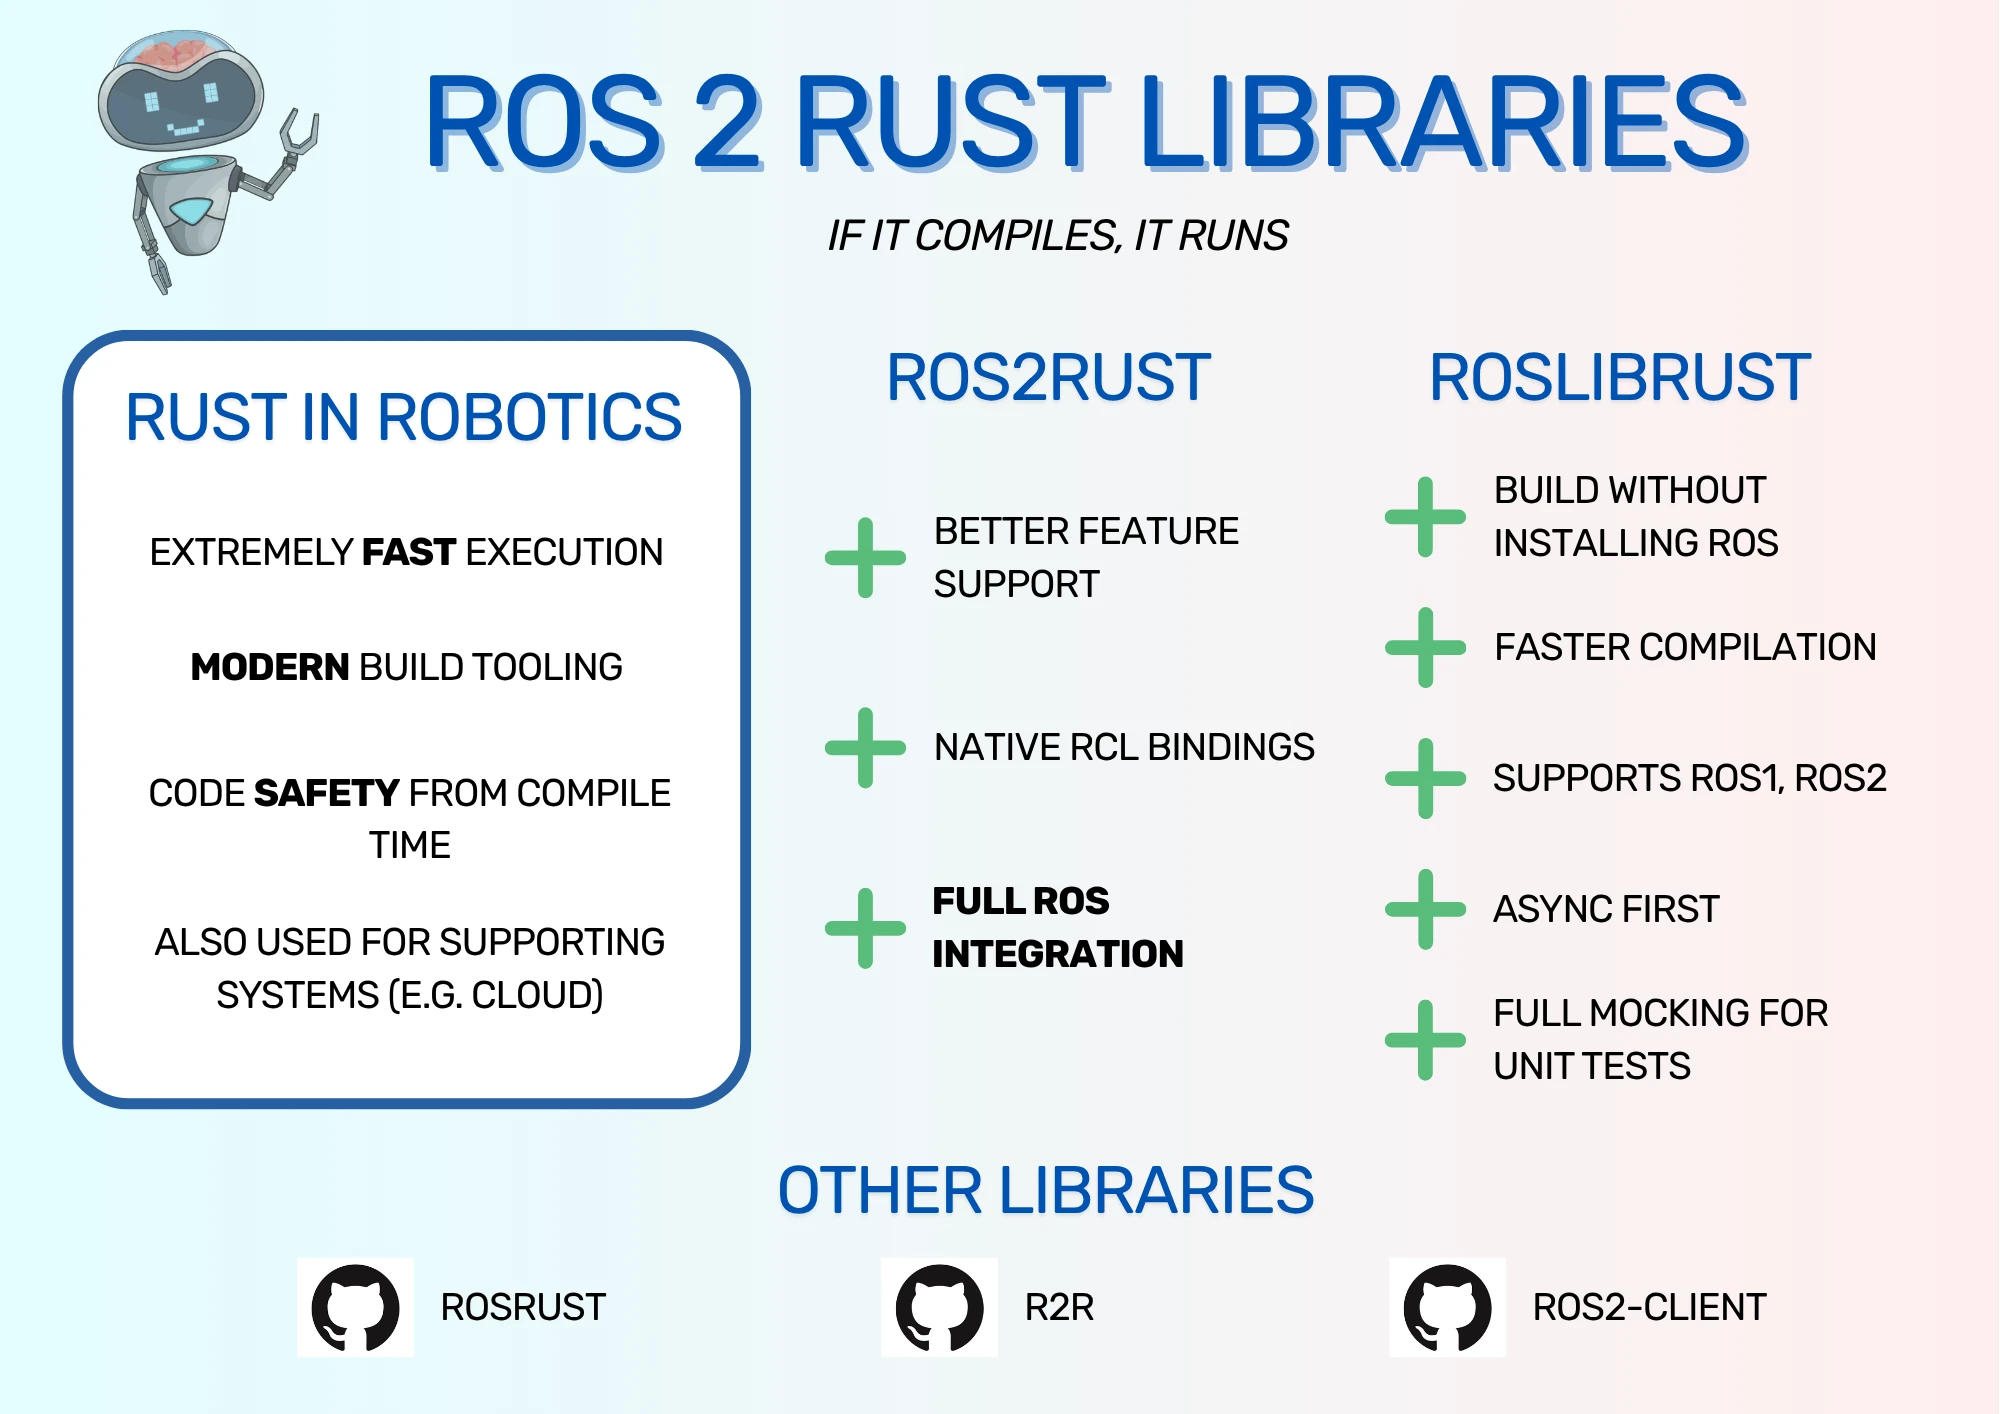
Essentially, Rust is a systems level language with an emphasis on speed, safety, and concurrency. It is comparable to C++, which is heavily used for robotics code, particularly real-time and high-performance applications like processing high frequency sensor data. As Rust can operate in the same space as C++ and comes with some advantages, such as more user-friendly tooling and helpful compiler errors, it's a great candidate for programming in robotics.
Rust can operate well at other levels too, such as backends for web services; having one language for every level of your robotics stack, right up to the cloud, does bring significant benefits in code reuse and cross-team collaboration.
I also personally find Rust fun to program in, and tend to look for projects where I can use it!
The main reason I would warn against using Rust for robotics is that the support for C++ is much better; there are more code samples available and the ROS C++ client library rclcpp is feature-complete.
Rust in ROS
ros2rust
Until now, I had only considered using ros2rust for writing ROS nodes in Rust. This package provides a client library called rclrs, similar to rclcpp, that follows the standard ROS client library layout.
In the standard ROS client library layout, there are two base layers written in C, called rmw and rcl. rcl is the ROS client library. Any client library in another language, such as rclcpp and rclpy for C++ and Python respectively, then call into rcl to interact with ROS. That means that any changes made to rcl will automatically be used in rclcpp, rclpy, and any other client library - including rclrs.

rclcpp, rclpy, rclrs and so on. Those libraries call into rcl, which then writes messages to the middleware layer rmw. See the ROS 2 documentation for more information.It also means that nodes built with ros2rust behave like other ROS nodes. They can be built with colcon, they can be launched from launch files, and messages built in their packages can be accessed by other ROS nodes. In short, it looks like a classic ROS node, just like if it had been built in Python or C++.
roslibrust
The contender to ros2rust in this post is roslibrust, which has a different approach to interacting with ROS. Here are a few reasons to consider using roslibrust over ros2rust:
- The programming interface is built to be async-first. Tasks can be defined and passed to an async framework to run in parallel, which has advantages if the tasks are waiting on data for long periods of time. However, for applications that are processing high volumes of data, the advantage of async is minimal.
- Instead of using the
rcllibrary,roslibrustrebuilds everything from scratch. This means that it has no dependency on the ROS build system except for the message repositories, so you can build it without a ROS installation before deploying it to your ROS-based system. This makes the build process faster and smoother. roslibrustsupports multiple backends by providing theRostrait. A trait in Rust is like an interface from other languages, such as Java. Any backend implementation that supports theRostrait can be used by the sameroslibrustcode, meaning that ROS1 and ROS2 can be supported by the same application code.- The same trait abstraction allows
roslibrustto support a complete mocking system, allowing for extremely fast unit tests. This is a huge selling point to me! - The library currently passes data using
rosbridgeto interact with ROS 2. However, because ROS is soon switching to the Rust-based Zenoh messaging as its default middleware,roslibrustcould potentially build a new backend implementation that directly calls into Zenoh. This would bypass the wholerosbridge->rcl->rmw-> middleware stack that it currently uses, making it much more efficient.
If you are looking for an open-source project to contribute to, roslibrust would love to have you! If you're interested in helping, take a look at the Github repository, try the code out for yourself, then look for a good first issue from the Issues page and get stuck in.
Other Client Libraries
There are a few other libraries that offer ROS 2 nodes written in Rust. Two take the same approach as roslibrust, meaning that they build the ROS interaction layer from scratch, while one still provides bindings to rcl (but without relying on the ROS 2 build system). However, these projects seem to be less active than roslibrust based on Github commit history when I checked, and they didn't offer the same async-first approach. Having said that, the biggest reason I didn't include them in this post is because I haven't had time to explore them! If you're interested in taking a look at these alternatives, the links are below. If you know of any others, please leave a comment and I'll happily add them.
- ros2-client: A Rust native client library for ROS 2, using RustDDS for communication.
- r2r: Provides bindings for ROS 2 that do not require hooking in to the ROS 2 build infrastructure by relying on already-generated C code.
- rosrust: A pure Rust implementation of a ROS client library.
Let's take a look at a sample application to see the differences between roslibrust and ros2rust in action.
Sample Application
This section demonstrates how both libraries handle the ROS fundamentals of publishing, subscribing, and services through a simple test application. The sample application has three nodes:
- A publisher node, which publishes an incrementing count once per second. This tests the library's ability to publish ROS standard messages.
- A subscriber node, which subscribes to IMU data and adds up the x values of the angular velocity. This isn't helpful by itself, but does show the ability to receive data and do something with it. I can also test this with a Gazebo simulation to check that the node is integrated into the ROS 2 system correctly, rather than relying on command-line tools alone.
- A service for multiplying two numbers together. Crucially, this uses a custom ROS message to test that both libraries can handle custom messages.
With this specification in place, the two implementations are available at https://github.com/mikelikesrobots/imu_tracker_roslibrust and https://github.com/mikelikesrobots/imu_tracker_ros2rust for roslibrust and ros2rust respectively.
Installing Dependencies
To set the repositories up, I used my WSL instance of Ubuntu with ROS 2 Jazzy installed. Each repository got its own ROS 2 workspace. This is where the first caveat comes in: the roslibrust version doesn't need to be in a workspace for its initial build. However, because it has a custom message that I need to access from the ROS 2 system later, it's easier to build it from a ROS 2 workspace to begin with.
Both packages need Rust installed, which on Ubuntu is as simple as:
curl --proto '=https' --tlsv1.2 -sSf https://sh.rustup.rs | sh
Then restart the terminal. ros2rust does need extra dependencies, so ROS 2 needs to be installed (installation instructions), as well as a couple of extra tools:
pip install git+https://github.com/colcon/colcon-cargo.git
pip install git+https://github.com/colcon/colcon-ros-cargo.git
These extra tools help integrate the build with colcon, such that after the first colcon build, cargo will work correctly with the package.
Finally, roslibrust requires the rosbridge package to interact with ROS, so that needs to be installed:
# Change jazzy for your ROS installation
sudo apt install -y ros-jazzy-rosbridge-server
Cloning the Code
Setting up the ros2rust version should be familiar for ROS 2 users. The process is to create a workspace, clone the repo, then use the vcs tool to check out the remaining dependencies.
mkdir -p ~/ros2rust_ws/src
git clone https://github.com/mikelikesrobots/imu_tracker_ros2rust ~/ros2rust_ws/src/imu_tracker_ros2rust

vcs import ~/ros2rust_ws/src < ~/ros2rust_ws/src/imu_tracker_ros2rust/imu_tracker_ros2rust.repos
vcs import ~/ros2rust_ws/src < ~/ros2rust_ws/src/ros2_rust/ros2_rust_jazzy.repos
The roslibrust version is similar, but with just two clone commands. Recurse submodules is used to check out the message packages needed for message generation. The mult_msgs package contains a single custom message for the service, and could have been checked out inside imu_tracker_roslibrust. I did it this way to ensure the custom messages are available to other users of the ROS workspace.
mkdir -p ~/roslibrust_ws/src
git clone --recurse-submodules https://github.com/mikelikesrobots/imu_tracker_roslibrust ~/roslibrust_ws/src/imu_tracker_roslibrust
git clone https://github.com/mikelikesrobots/mult_msgs ~/roslibrust_ws/src/mult_msgs
Building the Code
The ros2rust workspace must initially be built using colcon, as follows:
# Source ROS, if not already done
source /opt/ros/jazzy/setup.bash
cd ~/ros2rust_ws
colcon build
source install/setup.bash
This build will take a significant amount of time, because it's building all of ros2rust alongside the application package. Also, subsequent builds will check all of the ros2rust packages for changes, which still takes quite a bit of time even if you haven't made any changes. Instead, after the first build, you can select only the application package to build or directly use cargo:
colcon build --packages-select imu_tracker_ros2rust
# Alternatively:
cd ~/ros2rust_ws/src/imu_tracker_ros2rust
cargo build
If you use VSCode with extensions that support Rust, you can open up the imu_tracker_ros2rust directory with VSCode and it should work correctly, including autocompletion and looking up symbols. The same is true of the imu_tracker_roslibrust directory in the next section.
For imu_tracker_roslibrust, the process is just to use cargo:
cd ~/roslibrust_ws/src/imu_tracker_roslibrust
cargo build
This will download roslibrust as a dependency crate and build it. However, it doesn't make our custom messages available to the ROS 2 ecosystem, so we still need to use ROS 2 for that part:
cd ~/roslibrust_ws
colcon build
source install/setup.bash
Testing Each Application
roslibrust relies on rosbridge to pass messages, so run this as a separate node, making sure to source the roslibrust workspace to get access to its custom messages:
# Get access to mult_msgs package with custom message
source ~/roslibrust_ws/install/setup.bash
# Run rosbridge
ros2 launch rosbridge_server rosbridge_websocket_launch.xml
From here onwards, the instructions are the same, except for changing ros2rust for roslibrust. Hence, I'll only write the details once for ros2rust.
Set the application running:
source ~/ros2rust_ws/install/setup.bash
ros2 run imu_tracker_ros2rust imu_tracker_ros2rust
This gave a startup log:
Counting node has started!
counter: Published 0
IMU summing node has started!
Float multiplying service has started!
I could then subscribe to the /example_counter topic to get the count:
ros2 topic echo /example_counter
Which gave the following output:
---
data: 40
---
data: 41
---
data: 42
---
The count is incrementing, and there's one new message per second, just as expected.
Next is the float multiplication service. This needs the custom messages available to work correctly:
source ~/ros2rust_ws/install/setup.bash
ros2 service call /mult_floats mult_msgs/MultFloats "{x: 2.5, y: 4.0}"
That gave me the following:
waiting for service to become available...
requester: making request: mult_msgs.srv.MultFloats_Request(x=2.5, y=4.0)

response:
mult_msgs.srv.MultFloats_Response(result=10.0)
So far, so good! The node can accept custom messages that I've defined and give the correct response.
Finally, I can test the IMU code. This also tests that the application is able to subscribe to other topics from ROS2 other than messages I've published. To do so, I install the Turtlebot 3 simulation package with:
sudo apt install -y ros-jazzy-turtlebot3-simulations
Then ran the simulation with:
export TURTLEBOT3_MODEL=waffle_pi
ros2 launch turtlebot3_gazebo turtlebot3_world.launch.py
My node then started printing out the data it was receiving:
Got x: 0.00016605295940326384, sum: 0.0013029570806488157
Got x: -0.00010373969315866868, sum: 0.001199217387490147
Got x: -0.00007269928155955913, sum: 0.0011265181059305878
Got x: 0.00002150106849010582, sum: 0.0011480191744206937
Got x: -0.0004081654500772328, sum: 0.0007398537243434609
Got x: 0.000375131405007245, sum: 0.001114985129350706
Got x: 0.00020263544247801625, sum: 0.0013176205718287222
Got x: 0.0002873354535022987, sum: 0.001604956025331021
Got x: -0.00023864045717770534, sum: 0.0013663155681533155
Got x: -0.000059679387952645265, sum: 0.0013066361802006703
Perfect - data received from another node in a ROS 2 network successfully.
I then repeated this full set of tests with roslibrust, and got the same correct behaviour, albeit with printed lines being slightly different. Both libraries have the basics working, so the next step is to dig into the code to see how the API looks.
Comparing Code From Each Library
Counting Node
ros2rust
ros2rust commonly uses a pattern where each node has a struct that contains everything it needs. In this case, the struct contains the node itself, the publisher for example_counter topic, and the data that is being incremented. Each of these are wrapped in Arcs, which makes them sharable across threads. Sharing across threads makes a lot of sense in a system that allows callbacks and multi-threading as ROS does.
struct CounterNode {
    _node: Arc<rclrs::NodeState>,
    publisher: Arc<rclrs::PublisherState<Int16Msg>>,
    data: Arc<Mutex<i16>>,
}
Initialisation comes from creating a new struct from a Ros Executor object. This might have issues, so the function returns a Result in case any errors occur. The current count is stored in the struct as the data object so it can keep being incremented between publish calls.
fn new(executor: &rclrs::Executor) -> Result<Self, rclrs::RclrsError> {
    let node = executor.create_node("counter")?;
    let data = Arc::new(Mutex::new(0i16));
    let publisher = node.create_publisher::<Int16Msg>("example_counter")?;
    Ok(Self {
        _node: node,
        publisher,
        data,
    })
}
I then run the publishing node in its own thread, where each iteration of the thread publishes the count, prints out a message, increments the count, then waits for a second.
fn start(self) {
    std::thread::spawn(move || -> Result<(), rclrs::RclrsError> {
        loop {
            self.publisher.publish(&Int16Msg {
                data: *self.data.lock().unwrap(),
            })?;
            println!("counter: Published {}", *self.data.lock().unwrap());
            *self.data.lock().unwrap() += 1;
            std::thread::sleep(std::time::Duration::from_millis(1000));
        }
    });
}
I could have used the log_info macro instead of println here, which would have worked better with the ROS logging system. Instead, I chose to match the behaviour of roslibrust using println, as roslibrust doesn't support ROS logging (that I know of).
roslibrust
roslibrust's way of operating is to use async tasks instead of full threads. One function creates a publisher, stores data in local variables, and starts looping. Each loop publishes the count variable, then uses tokio time intervals to wait until the next second has elapsed. Tokio is the async framework that handles all the task execution logic, which is how all the tasks can run in parallel within the same thread.
While roslibrust application code is written as async tasks, these tasks can be executed in the same thread or across multiple threads. This depends on the tokio configuration. By default, Tokio creates as many worker threads as there are cores.
async fn pub_counter(ros: impl roslibrust::Ros) {
    let publisher = ros
        .advertise::<std_msgs::Int16>("example_counter")
        .await
        .unwrap();
    let mut counter = 0;
    let mut interval = tokio::time::interval(tokio::time::Duration::from_secs(1));
    loop {
        interval.tick().await;
        publisher
            .publish(&std_msgs::Int16 { data: counter })
            .await
            .unwrap();
        println!("Published {counter}");
        counter += 1;
    }
}
Note that the publisher is constructed from the ros object passed in to the function, which implements the Ros trait. This is how roslibrust handles different backends; create a backend implementation that supports the Ros trait, and the code inside the function can use that implementation without knowing what it is. That means this code works just as well for ROS 1 as it does for ROS 2 - just pass in a different backend implementation. This is also how roslibrust supports excellent mocking: pass in a backend that uses mock data structures, and you can fully unit test your code. Here's a unit test doing exactly that:
    #[tokio::test(start_paused = true)]
    async fn test_pub_counter() {
        let ros = roslibrust::mock::MockRos::new();
        let mut subscriber = ros
            .subscribe::<std_msgs::Int16>("example_counter")
            .await
            .unwrap();
        tokio::spawn(async move { pub_counter(ros).await });

        // Confirm we get the first message
        let msg = subscriber.next().await.unwrap();
        assert_eq!(msg.data, 0);
        ...
    }
This test shows constructing a mock backend, subscribing to the same topic that the publisher publishes to, then building the counter and passing it to Tokio to manage. This is all the setup needed before checking received messages, and Tokio simulates time passing instead of actually waiting, meaning that all the tests run extremely quickly. The test in the source code also checks the timing of publishing and the counter being incremented, but I left these out for brevity.
IMU Summing Node
ros2rust
In ros2rust, the subscription takes a function that can be called when a new message is received:
let subscription =
    worker.create_subscription("/imu", |data: &mut SumData, msg: ImuMsg| {
        data.sum += msg.angular_velocity.x;
        println!("Got x: {}, sum: {}", msg.angular_velocity.x, data.sum);
    })?;
The data passed in here is the running sum of data, and ros2rust will pass the updated data to each invocation of the callback function, which allows it to keep a sum of data over time.
roslibrust
In roslibrust, instead of the subscription taking a callback function as a parameter, the task itself waits for messages to be received before acting on them. Once any message is received, it adds the x value to the state variable originally passed into the function and prints out the new value. This is slightly different from the publisher function storing the data locally, but by passing in a reference to an f64 instead of using local data, we can then check the value is added to correctly in unit tests.
async fn imu_summer(ros: impl roslibrust::Ros, state: Arc<Mutex<f64>>) {
    let mut subscriber = ros
        .subscribe::<sensor_msgs::Imu>("/imu")
        .await
        .expect("Could not create subscriber!");

    loop {
        let msg = subscriber.next().await.expect("Failed to get a message!");
        *state.lock().await += msg.angular_velocity.x;
        println!(
            "Got x: {}, sum: {}",
            msg.angular_velocity.x,
            *state.lock().await
        );
    }
}
Float Multiplication Node
In both versions of the service, the service is created with a callback function to respond to the incoming request.
ros2rust
In ros2rust, the callback function is given a request structure and some information, and is expected to return a response:
fn handle_mult_floats(request: MultFloats_Request, _info: ServiceInfo) -> MultFloats_Response {
    println!("Received request: {:?}", request);
    let result = request.x * request.y;
    println!("Responding with result: {}", result);
    MultFloats_Response { result }
}
Note that the service handler can only return a response, not a Result type.
The service is then constructed and stored in its own MultFloatsNode structure:
fn new(executor: &rclrs::Executor) -> Result<Self, rclrs::RclrsError> {
    let node = executor.create_node("mult_floats")?;
    let service =
        node.create_service::<MultFloats, _>("mult_floats", Self::handle_mult_floats)?;
    Ok(Self { service })
}
roslibrust
In roslibrust, the process is very similar. The callback function is defined first:
fn handle_mult_float(
    req: mult_msgs::MultFloatsRequest,
) -> Result<mult_msgs::MultFloatsResponse, ServiceError> {
    println!("Received request: {:?}", req);
    let result = req.x * req.y;
    println!("Responding with result: {}", result);
    Ok(mult_msgs::MultFloatsResponse { result })
}
In this case, the return type is a Result, meaning that the function can return an error if something went wrong.
The service itself is then built using:
async fn mult_floats(ros: impl roslibrust::Ros) {
    let _handle = ros
        .advertise_service::<mult_msgs::MultFloats, _>("/mult_floats", handle_mult_float)
        .await
        .unwrap();

    tokio::signal::ctrl_c().await.unwrap();
}
Waiting on the Ctrl+C signal allows the service to operate without being cleaned up until the node is terminated.
Main Function
ros2rust
To start all of the nodes in ros2rust, an executor is the simplest method:
fn main() -> Result<(), rclrs::RclrsError> {
    let mut executor = rclrs::Context::default_from_env()?.create_basic_executor();
    let counter = CounterNode::new(&executor)?;
    counter.start();
    ...
Once all the nodes have started, the main process spins until stopped or an error occurs:
    ...
    executor.spin(rclrs::SpinOptions::default()).first_error()?;
    Ok(())
}
roslibrust
In roslibrust, the main function creates the backend for all of the nodes, then starts each node, and finally waits for the Ctrl+C signal to terminate the node.
#[tokio::main]
async fn main() {
    // Create a rosbridge client we can use
    let ros = roslibrust::rosbridge::ClientHandle::new("ws://localhost:9090")
        .await
        .unwrap();

    tokio::spawn(pub_counter(ros.clone()));
    println!("Counting node has started!");
    tokio::spawn(imu_summer(ros.clone(), Arc::new(Mutex::new(0.0))));
    println!("IMU summing node has started!");
    tokio::spawn(mult_floats(ros.clone()));
    println!("Float multiplying service has started!");

    // Wait for ctrl_c
    tokio::signal::ctrl_c().await.unwrap();
}
Overall Comparison
In short, my recommendation is to use ros2rust for libraries and roslibrust for applications. That is, if you're looking to provide software support for a sensor or other device, it would work better to build it with ros2rust so it fully integrates in the ROS ecosystem. However, if you're looking to build something to run on your robot, roslibrust is a great choice. Neither library would be a bad choice, of course - it comes down to your personal preferences and what you're trying to achieve with your project.
I would still advise you to try out both libraries (and the other client libraries as well) to find their pros and cons. Here are my preferences between the two libraries:
| Category | Winner | Reason |
|---|---|---|
| ROS Integration | ros2rust | Native rcl bindings |
| Feature Support | ros2rust | More mature, better feature support |
| Ease of Setup | roslibrust | No ROS dependency |
| Build Speed | roslibrust | Much less dependency code to compile |
| Backend Support | roslibrust | Supports ROS1, ROS2, and more |
| Unit Testing | roslibrust | Mocked backend |
| Code Clarity | roslibrust | Async syntax, fewer callbacks |
| Performance | Unknown | Not measured |
ros2rust and roslibrust.The reasons given above are very high level. Below, I give more detail to explain my reasoning.
- ROS Integration:
ros2rust. All else being equal, I would prefer full ROS integration, such as launching with launch files and building the node alongside other nodes in the same workspace. - Feature Support:
ros2rust. Without giving the full list,ros2rustis more full-featured thanroslibrust, such as logging integration. Whether this matters for your use case depends on there features you need. - Ease of Setup:
roslibrust. Not needing a full ROS 2 installation makes the initial setup easier. - Build Speed:
roslibrust. Asros2ruststill needs the full library to be compiled alongside the application, the build time is much longer.roslibrusthas a much smaller set of code to compile, so it compiles much faster. - Backend Support:
roslibrust. This is a minor point for me as I'm generally going to use the ROS 2 backend, but if you need that flexibility, this may be more of a factor for you. Having said that, it would be a bigger plus once the direct Zenoh support is implemented inroslibrust. - The Code:
roslibrust. I slightly prefer the async syntax ofroslibrustbecause it uses fewer callbacks, although still not none. Fewer callbacks makes it easier to reason about, which is really important when designing a system. - Unit Testing:
roslibrust, by far. The complete mocking system is excellent. It is possible to unit test onros2rust, but it makes writing the code trickier to do, as you need to pass in your own mock structures. You could also do end-to-end testing with ROS in the loop, but this is much slower than unit tests with mocks. - Performance: I didn't measure. Measuring performance is tricky to do well, and could change between machines based on factors like how many cores it has. If you know of a good performance comparison, let me know, and I'll happily include it!
Overall, I was surprised at how much I enjoyed using roslibrust. I'm likely to use it for my own ROS 2 code when it's code I'm not planning to share. However, for code that I distribute on Github or this blog for educational purposes, I would still use ros2rust because of that complete ROS integration and extra feature set. The advantages of roslibrust seem numerous above, but are individually minor advantages compared to the ecosystem integration.
I'll always love having a fully mocked backend for unit tests, though.
Summary
Rust is a language operating at the same level as C++, although it's not as commonly used in the space, so support is not as mature. Still, it offers great performance, strong safety checks, and modern tooling, so it's a great choice for writing robotics code. I also personally find it very fun to work with!
There are a few libraries available for writing ROS 2 nodes in Rust. ros2rust and roslibrust seem to be the most actively maintained, and they take fundamentally different approaches.
ros2rustintegrates with the ROS ecosystem throughrclrs, giving full compatibility with launch files, ROS-based logging, and the colcon build system. It's ideal when you need native ROS behaviour, a more feature-complete client library, or plan to distribute your nodes as part of a larger ROS project.roslibrustis a pure Rust implementation designed around async execution. It builds faster, doesn't require a full ROS installation, supports ROS1 and ROS2 backends, and enabled extremely quick mock-based unit testing. This makes it great for applications running on your own robots.
For my personal projects, I'll likely reach for roslibrust, but stick with ros2rust for sharing code meant for others to learn from. Both are good choices for writing robotics code. Choose the library that works best for your application, and let me know what you think of them!