Getting Started with ROS 2
Many of the blogs on this site and the videos on my YouTube channel make use of ROS 2, but I have yet to describe what ROS 2 is or why it's worth taking the time to learn. This article is an entry level post on what ROS 2 is, the basic concepts, and why you might want to learn it.
If you'd prefer to see this post in video form, please check the following link for the YouTube video:
Why learn ROS 2 at all?
ROS 2 provides a useful framework for structuring robotics applications, as well as tools for interacting with robots and pre-built packages to provide functionality. This framework and tool set make it easier and faster to write robotics applications.
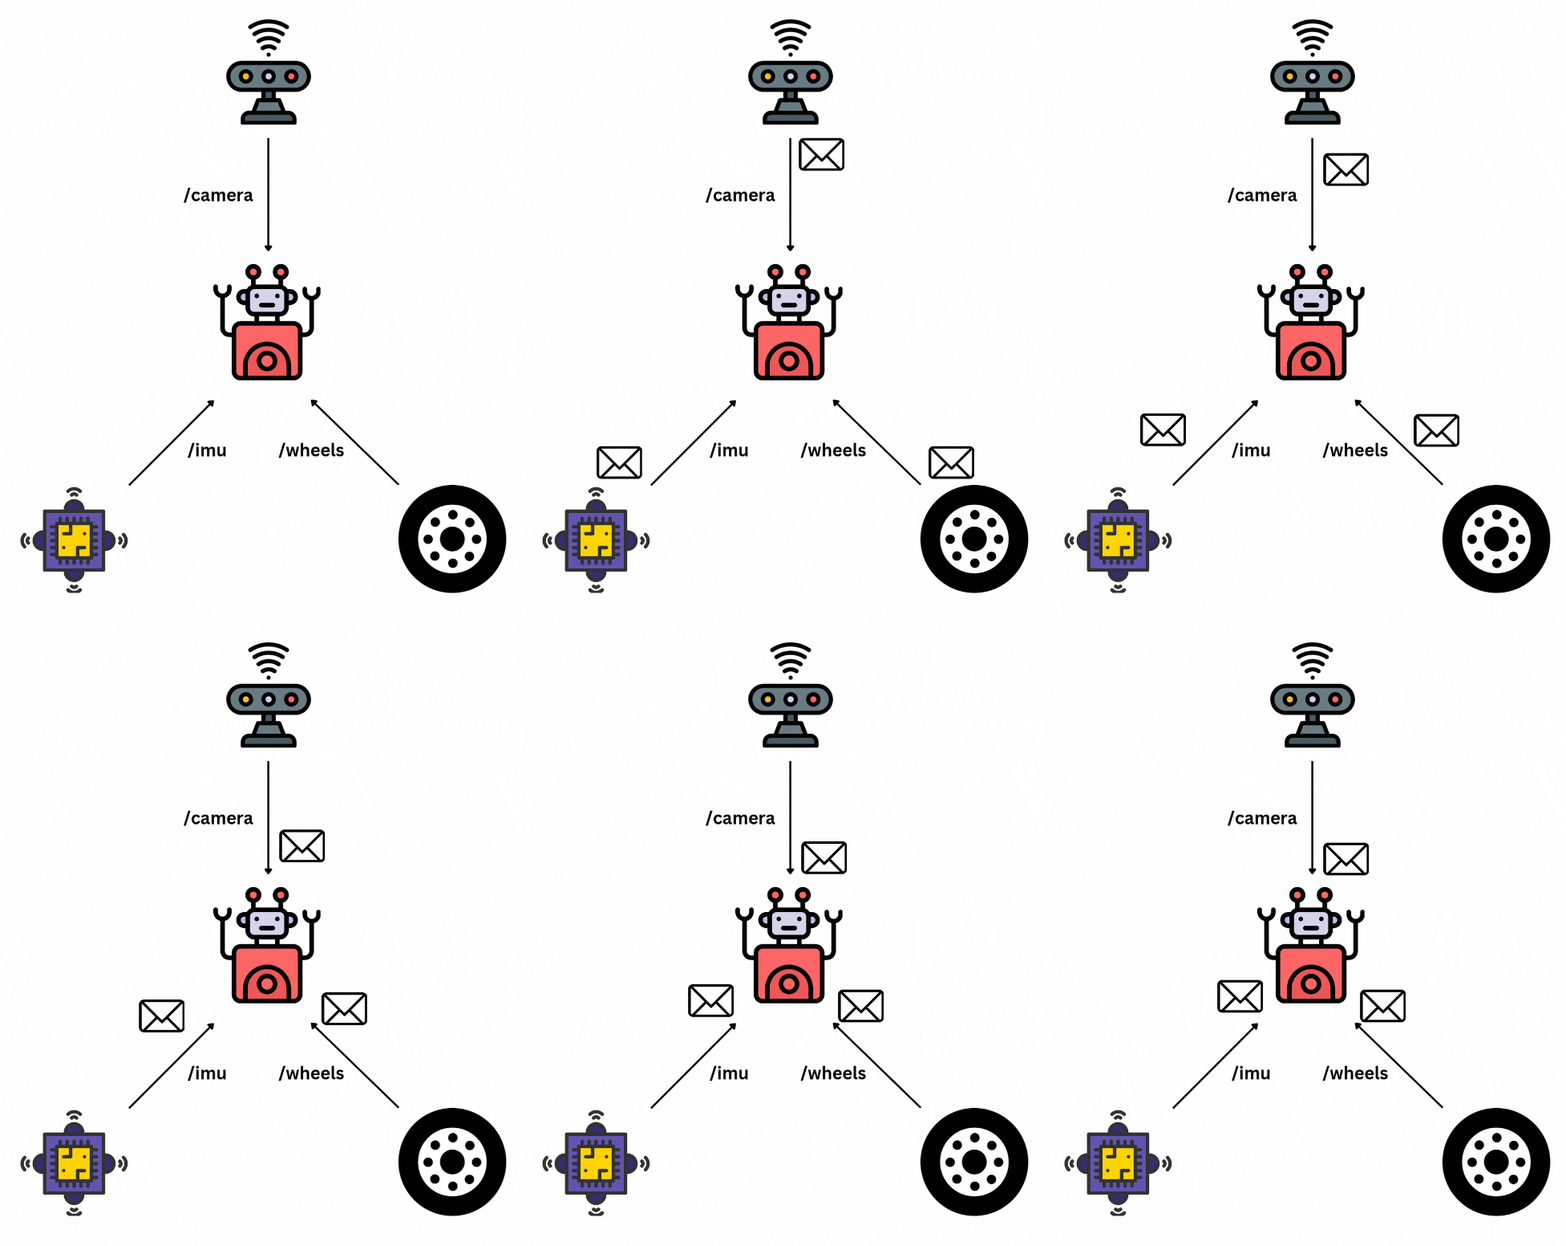
The more complex a robot application, the more it benefits from using a scalable structure, which is what ROS 2 aims to provide. For example, a mobile robot that needs a localization system to keep track of its position could use multiple sensors at the same time. Writing one huge robot program with localization buried inside it makes it increasingly hard to develop.
ROS 2 divides up chunks of software with different responsibilities into
different nodes, and allows nodes to communicate with each other. That means
our localization system can be its own node which uses data from the camera
node, the IMU node, and the wheel encoder node, with each sensor node
written separately.

Dividing up the software like this makes it much easier to scale up, add new functionality (such as new sensors), and distribute parts of the robot software across teams of engineers. It also makes it possible to inspect parts of the robot system, such as what each node is doing, or how frequently data is being read from a particular sensor.
It is not necessary to use ROS 2 to build scalable software. Many robotics applications can be written as one large program, or follow their own pattern for splitting up robot software. In fact, robotics companies frequently start their software in ROS 2, then adapt it to their own custom system over time. It is your choice whether to use it or not - but if you do, you will benefit from the de facto standard robotics software, which is being actively worked on and has a large, supportive community behind it.
ROS 2's Predecessor: ROS
ROS 2 is the successor to ROS, which stands for Robot Operating System. Original ROS had similar intentions to ROS 2 and proved very popular as a way to get a robot working quickly, because of the framework and tools it provided, and because it was free and open source software. ROS is still available for use, but given it is no longer being actively developed, new applications should use ROS 2.
ROS 2 takes the excellent starting point from ROS and improves upon the rest. For a beginner, the changes are not obvious, as the interface and structure is mostly the same. However, for intermediate level, having a new messaging system and the ability to secure communications are just a couple of the important improvements ROS 2 brings. All of this makes ROS 2 easy to recommend as a starting point for hobby projects and professional developments alike.
The rest of this article will focus on ROS 2 only.
ROS 2 For Beginners
Let's focus on a few major parts of ROS 2 in order to understand it. Understanding the concepts here should be enough to get you started following and understanding ROS 2 tutorials.
- Messaging System: how nodes in a ROS 2 network can interact with one another
- Packages: how software is divided up into standalone units that can be worked on separately
- Tools: how a ROS 2 user can inspect and interact with a running application
Messaging System
The messaging system is the first major benefit of ROS 2. The idea is to divide
up pieces of code for a robotics application into separate nodes, where each
node runs in a separate process and communicates with other nodes
through messages.
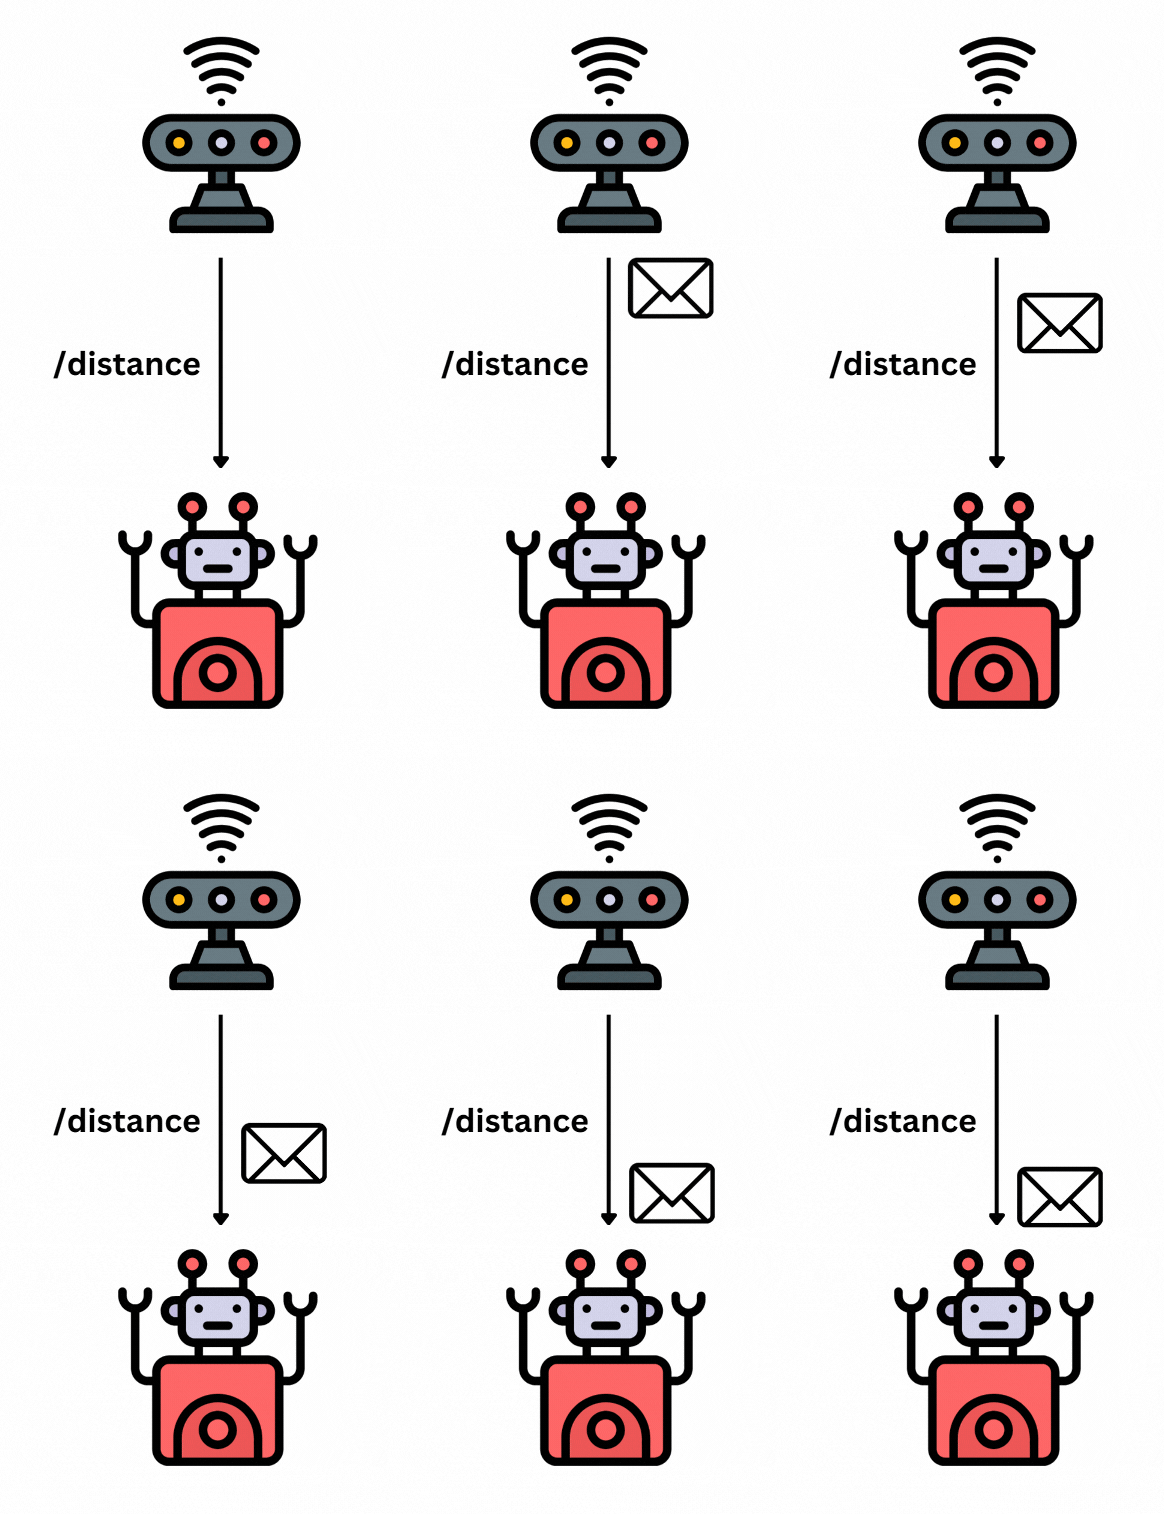
For example, this means that a robot with a distance sensor might have one
node sending distance messages and another node that listens to those
messages to stop the robot if an obstacle is too close.
ROS 2 provides a large number of common message types for use in robotics, such as an Image from a camera, or a Range measurement from a distance sensor. If these aren't enough, you can also define your own message types, allowing you to pass data around in a custom format.
Message passing comes in one of three main forms, explained in detail below:
Topics
Topics are the publish/subscribe model of ROS 2. Any node can publish data on any topic it wants, as long as that topic is not already in use for a different message type. Any number of nodes can publish to a particular topic.
On the other side, a node can subscribe to any topic it wants. To do so, a
subscriber says the topic it wants to subscribe to, the message type it is
expecting, and the code to call in case of a new message (a callback). Then,
whenever a new message comes in, the node's callback is called with the
message, allowing it to take action.
For instance, a robot trying to stop in front of obstacles may have two nodes:
- One node reading the distance sensors and publishing
Rangemessages on the/distancetopic - One node subscribed to
Rangemessages on the/distancetopic with a callback that stops the robot if the measuredRangeis too close
This allows the robot to stop in front of an obstacle, but also allows any other
node that needs Range measurements to subscribe to the /distance topic as
well.

Services
Services are the request/response model of ROS 2. In this model, any node can offer a service to perform a particular action. Another node can send a message to request that service; the first node will then perform the action and send back a response message.
For example, a robot arm with a gripper attachment might offer a service to close or open the gripper. Another node can request this service, which causes the gripper to open or close, then receives a response to its request.
Main Robot -> Gripper: [Request ] close gripper
Gripper -> Main Robot: [Response] gripper closed successfully
This method makes more sense when a node needs a response to its request before proceeding. In this example, the robot wants to completely grip an object before trying to move it, so it should wait for the response saying that the gripper is closed before moving any further.
Actions
Actions are very similar to services, except that they can optionally provide feedback before sending the final response back to the caller. Therefore, a node calling an Action will send a Request, receive some Feedback messages, then receive a final Response message.
In the gripper example from the previous section, the node controlling the gripper could offer an Action to close the gripper instead of the service. The Action would send feedback messages with the gripper's current width while it is closing. The Action might go something like this:
Main Robot -> Gripper: [Request ] close gripper
Gripper -> Main Robot: [Feedback] gripper is 8cm apart
Gripper -> Main Robot: [Feedback] gripper is 6cm apart
Gripper -> Main Robot: [Feedback] gripper is 4cm apart
Gripper -> Main Robot: [Feedback] gripper is 2cm apart
Gripper -> Main Robot: [Feedback] gripper is 0cm apart
Gripper -> Main Robot: [Response] gripper closed successfully
In this way, a node can act upon its feedback while the action is being performed. This allows the node calling the Action to perform related work; for example, while navigating along a path, a node could take camera snapshots and label them with the point along the route they came from.
Packages
ROS 2 packages are the next major part of ROS 2 to understand. Packages help divide up code into different folders, where each package contains one or more nodes. This helps engineers to keep track of where each part of the robot's code is.
This has an extra advantage. By splitting up code into different packages, it is possible to make your code reusable by other people - or reuse code written by other people. For example, to move a robot arm, you could use the ROS 2 package provided by the arm manufacturer instead of writing your own, saving you time developing and debugging your own.
Given ROS 2's popularity, there are a lot of packages available that you can use for yourself. All you have to do is install the package onto your system (or copy it into your ROS 2 workspace) and you can take advantage of new functionality. For example, you can use MoveIt to get access to motion planning, manipulation, 3D perception, kinematics, control, and navigation.
Tools
The final major benefit of ROS 2 is the tools provided by it. By building or installing ROS 2, you get access to tools that can help you inspect and interact with your robot. A few of the major tools are as follows:
- Recording: ROS 2 provides rosbags, which is a way of subscribing to topics and recording that data into a large file, or rosbag. This bag file can later be replayed to produce the same data again.
- Logging: ROS 2 allows nodes to log information as they run, which can then be recorded to see what happened to the robot as it ran, or viewed live using log viewers.
- Visualization: desktop applications can subscribe to topics, allowing for
visualization tools to exist. For example,
rqtcan visualize topics and is commonly used to view a robot and its environment, even allowing the user to set a goal position for the robot - which actually controls the robot. - Transformations: ROS 2 provides libraries for managing transformations between different parts of the robot. For example, the camera and gripper may be in different places, so if you spot an object you want to pick up from the camera, you need to transform that position to the gripper's frame of reference.
Between these tools, you can investigate the data being passed around on the robot live and from recording, check what your nodes are reporting in logs as they are working, and visualize your full robot and its environment - even sending navigation targets for your robot to move to.
A Practical Example
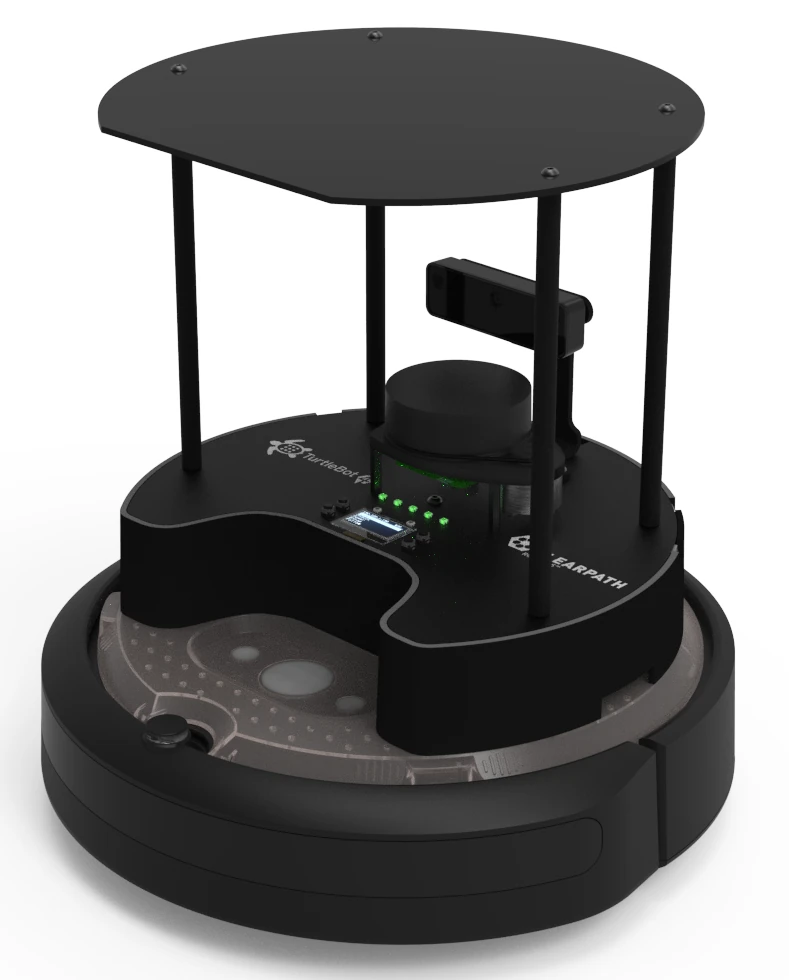
Let's take a look at a practical example - the TurtleBot 4. This is an autonomous robot with a large list of sensors, designed to be used as an educational platform for ROS 2. The site lists the following sensors available:
- 2D Lidar
- Stereo camera
- IMU
- Floor tracking sensor
- Wheel encoders
- Cliff sensors
- Bump sensor
- Slip detection
- ...
The robot is here, to give you an idea of everything sitting on top:

In this case, we want to use this robot to build a map of a house. We need to write code to read sensors, move the wheels, and build up a map of the house as the robot explores it (commonly known as SLAM: Simultaneous Localization and Mapping).
All of our sensors are likely to be useful for this application to some degree. Bump sensors can help find the exact wall location, wheel encoders and IMU can help with keeping track of our position, the cliff sensors make sure we don't fall off anything. However, that's a lot of sensors to write code for, and a lot of sensor data to make use of - and that's before we even get to the SLAM algorithm!
That is a lot of code to write. Writing one large file to control the robot will be hard to develop and keep track of, especially if multiple people are working together on it. This is where using ROS 2 would be very helpful to us - we can write separate nodes for each type of sensor, a node to control moving the wheels, and one or more nodes to define the behaviour of the robot.
But, it gets better than that. As mentioned, the TurtleBot is an educational platform for ROS 2. There are already packages for driving the robot and taking data from its sensors, and for navigation there is a ROS 2 package called Nav2. Between these packages, our robot application stops being a huge file and instead becomes a collection of pre-built packages, plus some custom code we write to tie it all together and launch it! There is still have some development to do, but so much of the heavy lifting has been done already.
We won't always be so lucky when building robots. Most of the time, the robot
will need some custom code for driving the motors and possibly some sensors. If
done correctly, these can still tie in to the rest of the ROS 2 ecosystem, like
the Nav2 package. If you're interested in the code for driving motors, take a
look at my ros2_control post, which goes in-depth
on how to build ROS 2 code to drive motors.
How Do I Get Started?
Having explained what ROS 2 is, why you might want to learn it, and some of the
major components, you are hopefully ready to learn it for yourself. If so, great
news! ROS 2 has extensive information on how to get up and running, including a
whole set of tutorials that use
their turtlesim software to let you try out anything you like without even
needing a robot of your own.
Further to this, ROS 2 is a very popular framework for robotics, meaning that there are a lot of resources available online for it - including on my own blog.
If you're looking for a challenge, and to build your own robot, take a look at the CamJam Edukit post. You can buy your own kit for a surprisingly low cost and have a go at building it for yourself. I will have a new post and video up very soon on how to run this post with ROS 2, and I will update this post once it's published - or you can subscribe to the YouTube channel to get notified when it's out.
Good luck on your ROS 2 journey!
