AWS IoT Greengrass: Concepts and Components!
AWS IoT Greengrass, or Greengrass for short, is a way of deploying software to an edge device, like a server on a factory floor, and managing the lifecycle of that software. From the cloud you can configure the software that is deployed to the edge and how that software is configured, as well as build your own software to be deployed by Greengrass.
There are three parts: building and deploying software applications, the device(s) that those applications are being deployed to, and the management service doing the deployment. This post goes over each part to explain how Greengrass as a whole works, and how you can try it out for yourself.
This post was originally published as a video, but given how many people it has helped, converting it to a blog post made sense. If you prefer video format, click below.
Management Service
The management service is the part of Greengrass running in the AWS cloud. In the AWS console, there are 3 subheadings under Greengrass devices that show the main concepts of the management service:
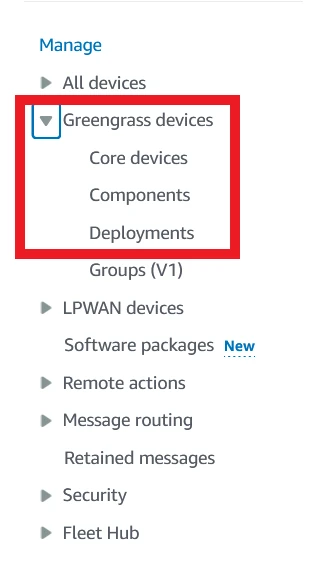
Core Devices
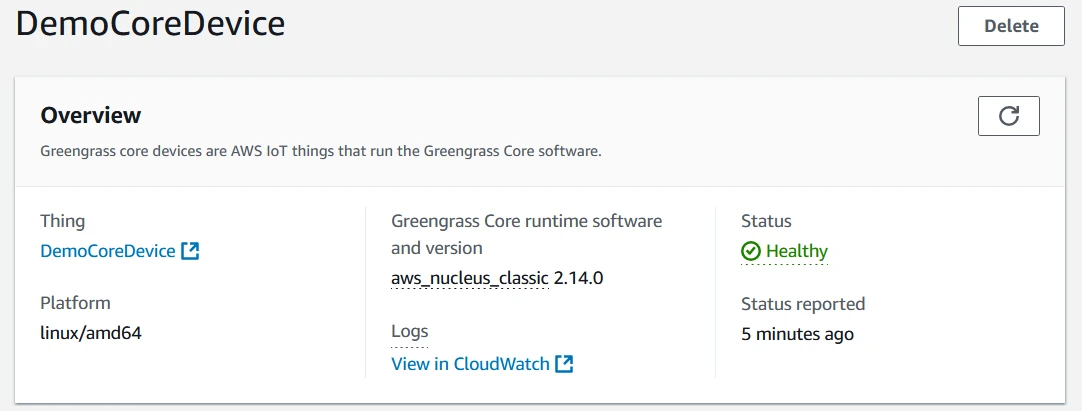
Each core device is a server or device at the edge which has been registered with Greengrass as a core device by the Nucleus software. In the console, clicking core devices will go to a list of all the core devices registered with the account.

The Nucleus is software deployed to all core devices. It is responsible for registering a device as a core device, managing the lifecycles of all software deployed to that device, and reporting the device status back to the cloud.
Clicking on any core device brings up more information about that device, such as its corresponding IoT Thing name, its status, logs, platform, and installed components. It also has a list of deployments, as each core device can have multiple deployments.
Deployments
A deployment is a group of components, with specific version numbers and configuration per component. When a deployment is created or revised, the information in that deployment is sent to a core device. The core device can then download any new components it needs, start and stop software as needed, and apply new configuration as instructed by the deployment.
In the console, opening a deployment shows its status, time of creation, and list of components within the deployment. Each component is listed with the version in the deployment. There are bullet points by each component to allow you to select that component and view its configuration. In the custom component built for this post, the message has been changed to "YouTube".

Components
A component is a defined bundle of software and the configuration needed to manage and run that software.
There are 3 types of components available from the Components list in the Console:
- My components
- Public components
- Community components
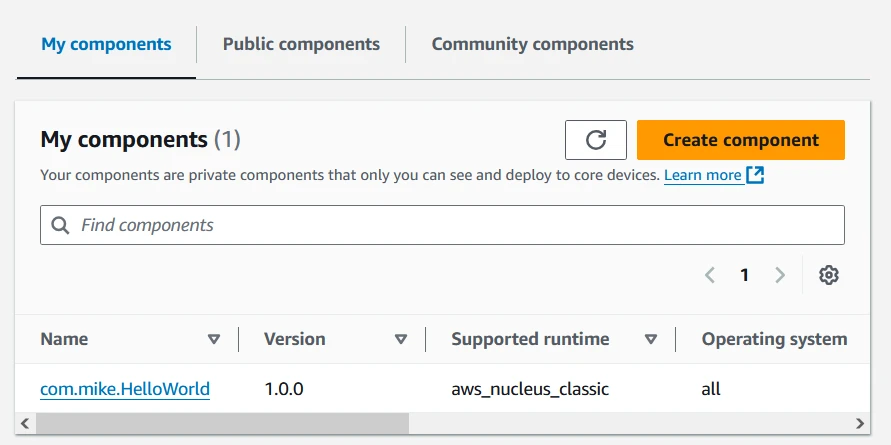
My components are the components that a user has built and uploaded to their AWS account. This means that you can build your own Greengrass components from scratch and make use of Greengrass to deploy and configure it to any core devices.
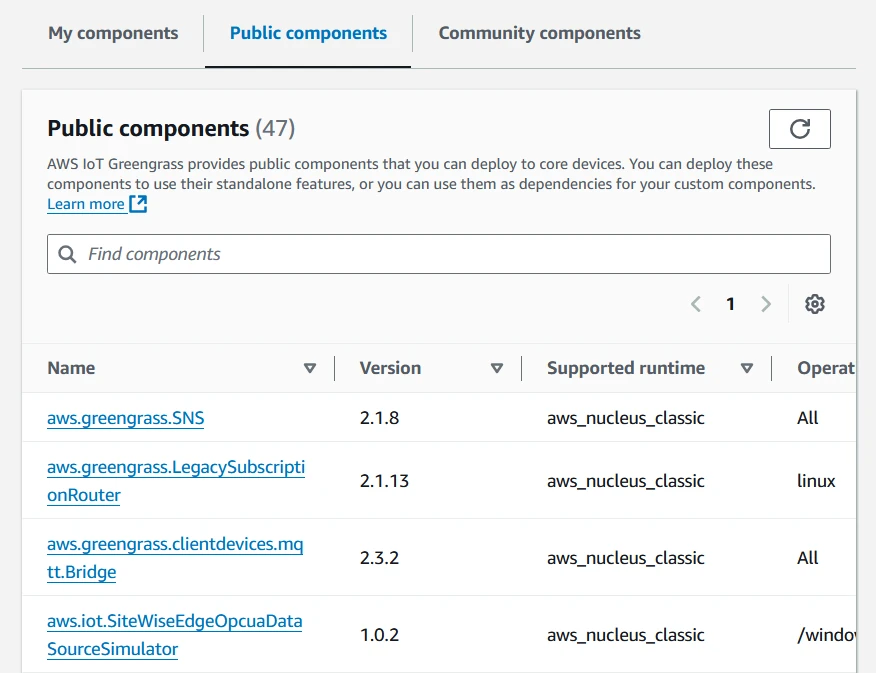
Public components are components made available by AWS directly. There is a long and growing list of components available here: a few examples are a Secrets Manager, for deploying Secrets to the device in a secure way; the MQTT bridge, which allows MQTT message passing from cloud to device and back; and Secure Tunneling, which allows a user to create an SSH tunnel from the cloud to the core device.
Finally, Community components are a list of components that the Greengrass team keeps track of that you can build and upload to your own account, then deploy to your own devices, just as with My components.
Management Service Summary
Overall, the cloud service is responsible for tracking core devices registered with Greengrass and managing deployments for those devices. Each deployment is a list of components with the exact version and configuration to be deployed. Components are the bundles of software and configuration that can be deployed to devices, which can be built by yourself (manually or from open source) or supplied by AWS.
Core Device Demonstration
To demonstrate setting up a core device for Greengrass, I'll use an EC2 instance. Feel free to follow along, although I wrote this as a demo rather than a lab; some steps may be missing.
You can follow the documentation at Install the AWS IoT Greengrass Core software, but I refer to instructions from the automatic provisioning link.
Provision EC2 Instance
First, I'm provisioning an EC2 isntance with these settings:
- Name: Greengrass Server
- AMI: Amazon Linux 2023 AMI
- Region: us-east-1
- Instance type: t2.micro
- Key pair: Proceed without
- Network: Any security group that allows port 22
- Storage: 30GiB gp3
- Number of instances: 1
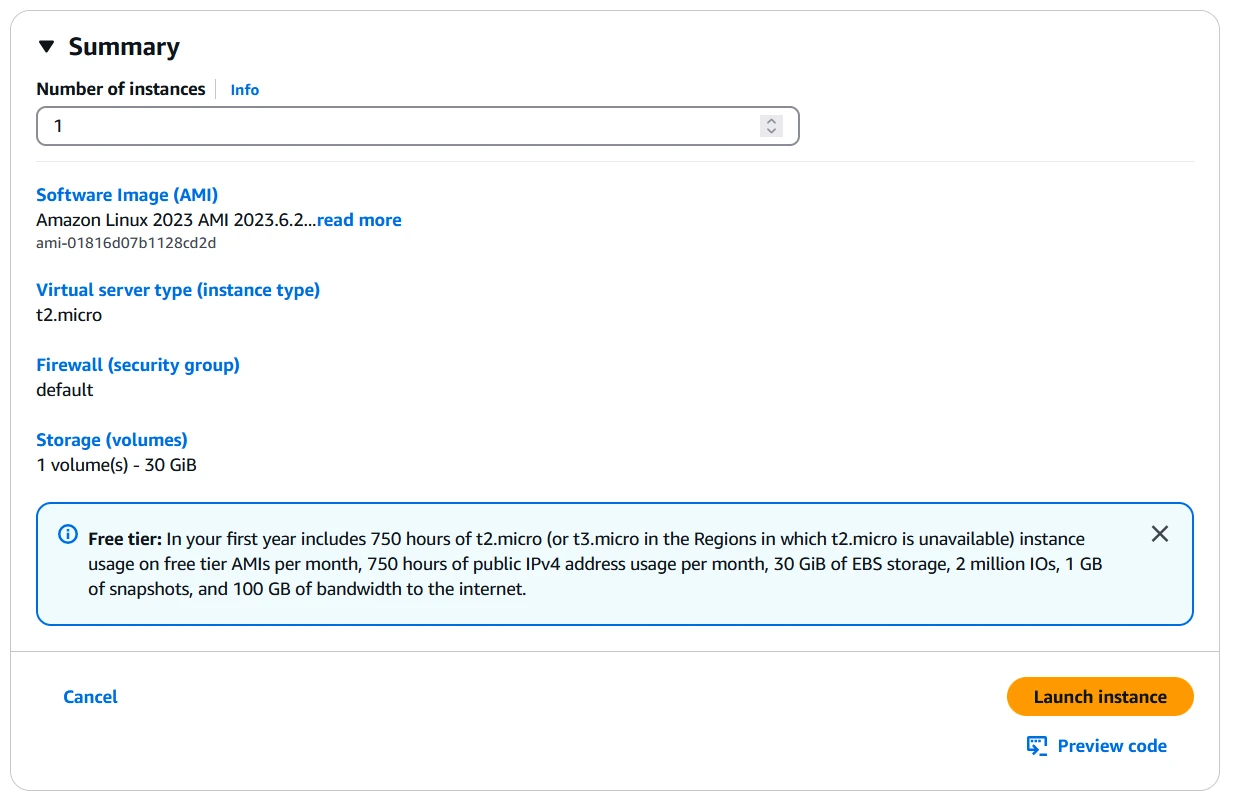
It's important that the machine has AWS CLI permissions for Greengrass to install itself correctly. I'm doing this by creating a role for EC2 with AdministratorAccess permissions and assigning it to the instance.
Install Greengrass Dependencies
With the instance up, I use Instance Connect to get a command line. I then install Java using the following command:
sudo dnf install java-11-amazon-corretto -y
Install Greengrass Core
There are a few ways to install Greengrass Core, but I tend to copy the installation commands from the console. Other ways are listed in the automatic provisioning instructions.
In the Console, I navigate to Core Devices, then click Set up one Greengrass core device. I'm leaving the name as it is, selecting no group, and leaving Linux as the selected Operating System.
For device setup method, I select "Set up a device by downloading and running an installer locally on device".
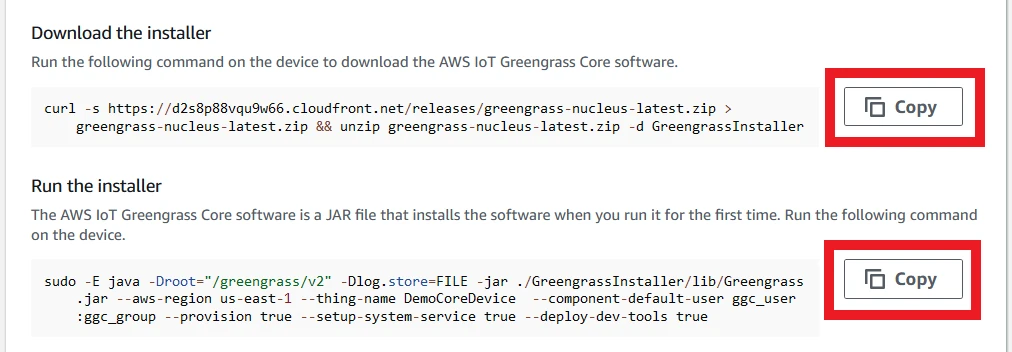
Credentials are already be configured from the provisioning step, so I just run the "Download the installer" and "Run the installer" commands one at a time to deploy the software.
Greengrass groups are a way of deploying the same deployment to multiple devices in the same group at once.
These commands will download a software bundle to install the core device, then run the bundle. The bundle creates users and permissions both locally and in the cloud to correctly function, and starts the Nucleus component.
Check Core Devices
With installation complete, the new core device appears in the list. If I click that device and go to the deployments, there is one deployment available. The deployment lists only the Cli component to be installed, and it has a Device status of Healthy and a Deployment status of Active (soon to become Completed).
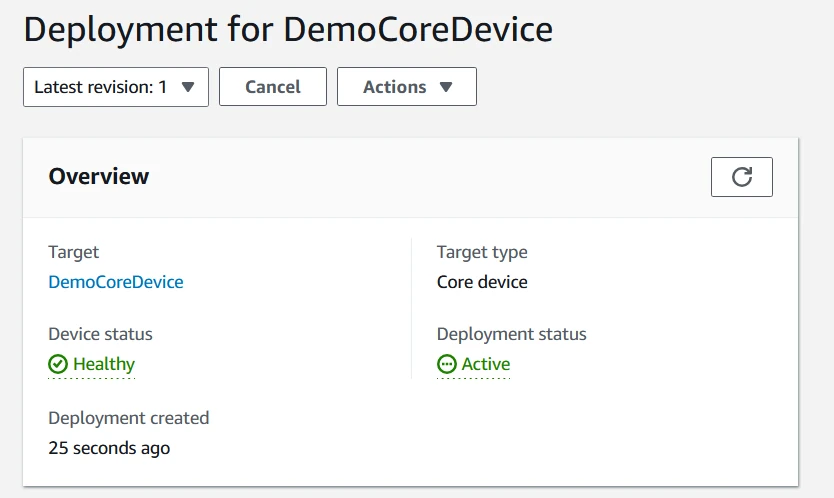
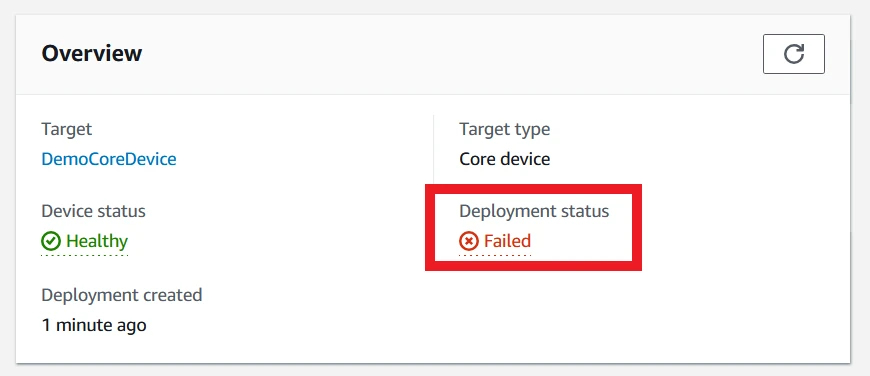
An Active status means that software is still being deployed to the device. Completed means a successful deployment.
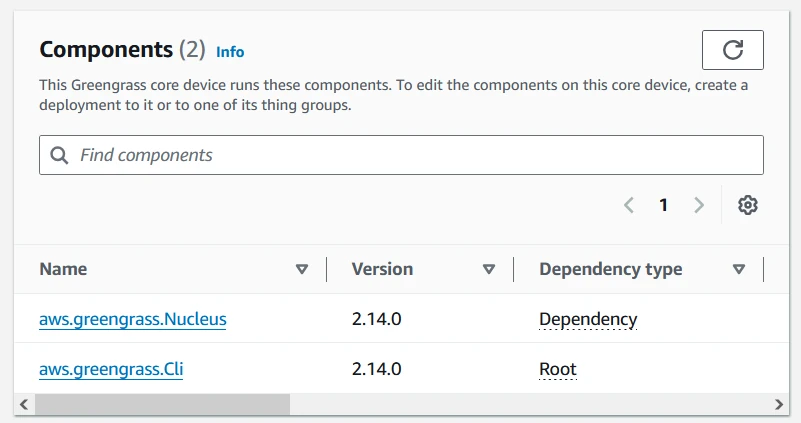
If we look at the core device again, it now lists several components, rather than just the Cli. The Cli depends on a few components to work correctly, and Greengrass will automatically install these dependencies for you.
Revise the Deployment
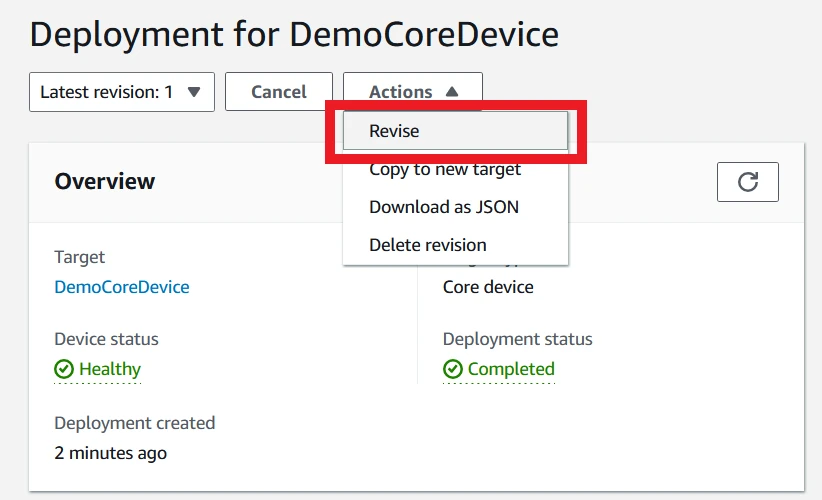
With the Cli installed on the new core device, it's time to deploy another component. This is done by revising the deployment. In the deployment screen, I select the Actions drop-down in the top right and click Revise.
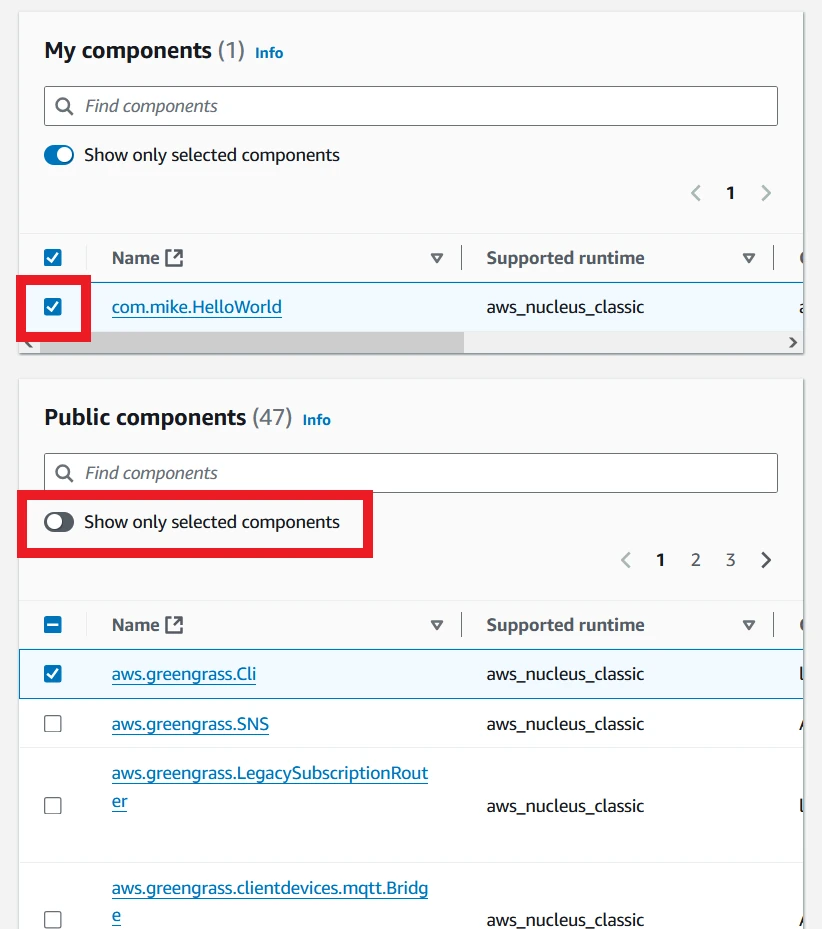
For the Select components screen, there are two tables available. The first is My components, which contains all of your custom components. Tick the custom component from this section.
There are also Public components. Only Cli will be visible here; to see other available components, uncheck the Show only selected components button.
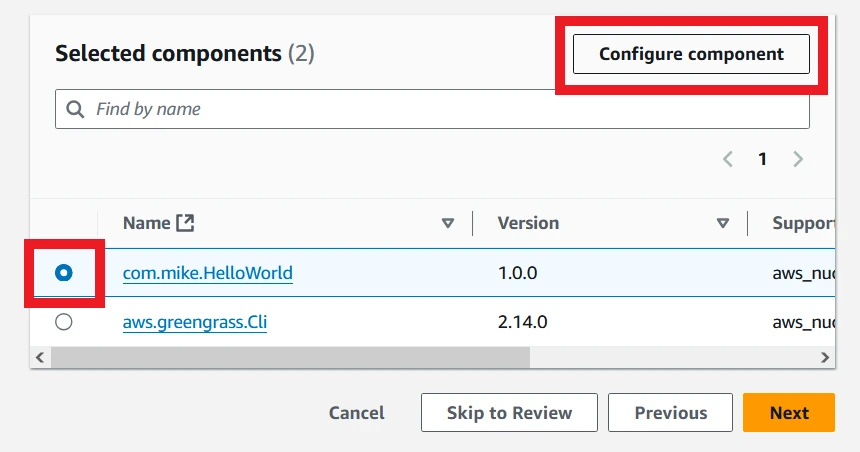
The next screen is for configuring components. I'm configuring the Hello World component by checking the circle by it and clicking Configure component. This shows the default configuration, the configuration paths to reset (clearing that configuration), and the configuration to merge (adding that configuration). For more information, see the recipe section later in this post.
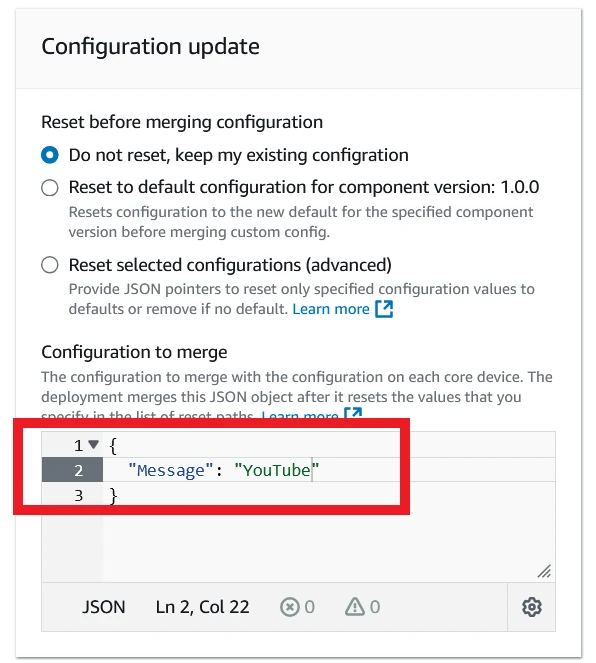
I add a new line in the Configuration to merge section:
{
    "Message": "Your Message Here"
}
Then I click Confirm and go to the next screen. This is advanced settings, which you are welcome to explore, but is out of scope for this post. Again, I click Next to go to the next screen.
Finally, I double-check the deployment on the Review screen, and click Confirm to start the deployment. Again, I have to wait for the deployment to complete.
If you are following along using the component from the Building a Component section, make sure you Authorize core devices to interact with AWS services - in this case, Greengrass needs to be able to download components from your S3 bucket.
Debugging Deployment Failures
The component fails to deploy, causing the deployment status to become Failed. In this case, we need to take a look at the device to figure out what went wrong.
I go back to the Instance Connect screen. Unless you've changed the installation
path, logs will be stored in /greengrass/v2/logs. I use vim as sudo user
to access this folder, as it is protected against your normal user.
sudo vim /greengrass/v2/logs
Here we can see all the logs available. The greengrass.log file contains the
log for the Nucleus software, and often contains errors to do with deployment
failures. However, in this case, the error will be in the component's log file,
com.mike.HelloWorld.log.
../
./
aws.greengrass.Nucleus.log
com.mike.HelloWorld.log
greengrass.log
loader.log
main.log
Within this log file, we can see that pip was not found as a program on the
system. The component uses pip to install dependencies, but it is not
installed by default.
2025-01-09T16:50:22.098Z [WARN] (Copier) com.mike.HelloWorld: stderr. /usr/bin/python3: No module named pip. {scriptName=services.com.mike.HelloWorld.lifecycle.Install, serviceName=com.mike.HelloWorld, currentState=NEW}
2025-01-09T16:50:22.106Z [WARN] (pool-3-thread-27) com.mike.HelloWorld: shell-runner-error. {scriptName=services.com.mike.HelloWorld.lifecycle.Install, serviceName=com.mike.HelloWorld, currentState=NEW, command=["python3 -m pip install virtualenv && python3 -m virtualenv venv && source ./ve..."]}
We need to install pip:
sudo dnf install -y python3-pip
Once complete, I revise the deployment in the AWS Console without changing any settings. You can just skip straight to the Review screen to do this. This time around, the console should show a health device and successful deployment.
Viewing Messages from the Component
To view the messages printed by the console, you can see the log messages and the MQTT messages.
The log messages are visible from within the text editor. Just as in the
debugging section, I use vim to open
com.mike.HelloWorld.log. This shows a list of messages showing that the
configured message has been repeatedly printed. Greengrass will capture any log
output from an application and store it in the logs directory for you to view.
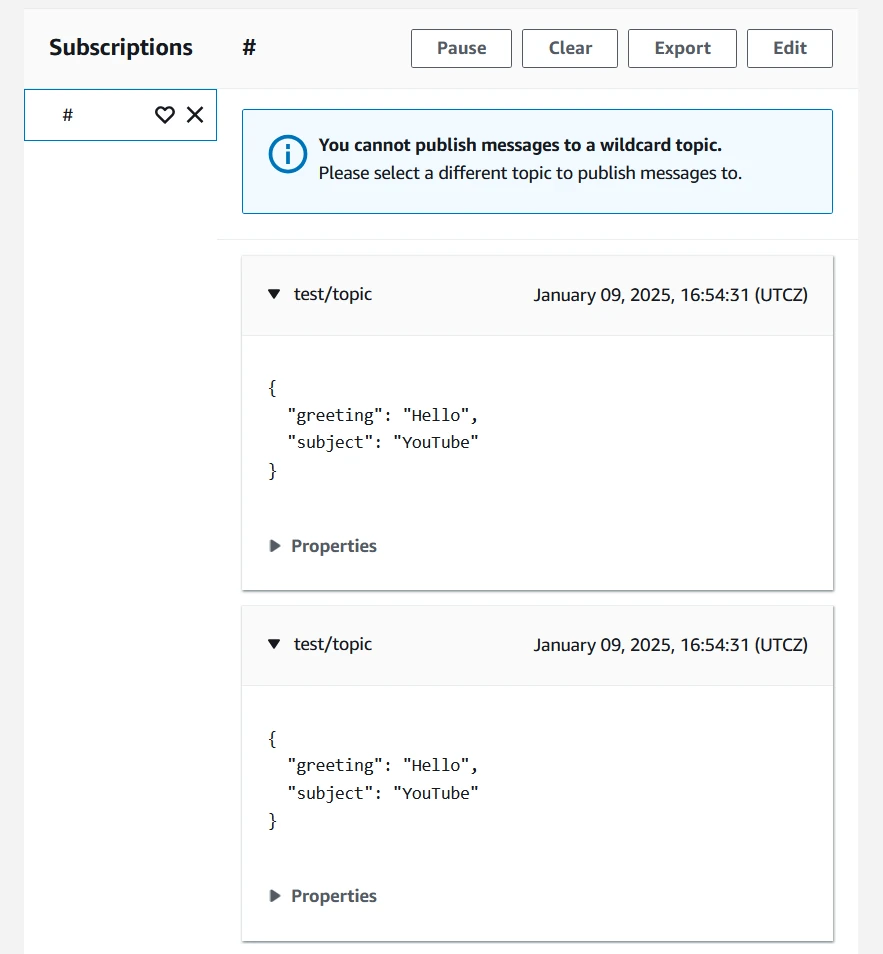
We can also see MQTT messages by going to the MQTT Test Client and subscribing
to the # topic, which receives all MQTT messages. Here, we should see two
messages per second with the custom message inside.
Summary
In this section, we saw how to provision an EC2 instance and configure it as a Greengrass core device. We saw that Greengrass automatically deploys the Cli component to it, after which we can revise the deployment to include our own components. We also saw how to debug a deployment failure. Finally, we saw our successfully deployed Hello World component printing messages to log files and sending MQTT messages to IoT Core.
Building a Component
To show building a custom component, I'll use the source code in the greengrass-hello-world Github repository. This component will print a configurable message to the log file and send the same message to IoT Core using MQTT.
Let's take a look at the important files in the repository.
The README
The README is less useful to understand the anatomy of a component, but it is the best starting point for figuring out how to build and deploy the component for yourself.
Main file
The entry point of the software is
HelloWorld/main.py.
This is a simple script which receives command line
arguments
from Greengrass to determine what message to send and how often to send it. It
will print the message directly using a debug
log,
and it will use the helper class IoTPublisher to post it as an MQTT message
to IoT
Core.
IoTPublisher
IoTPublisher is defined in the HelloWorld/src/iot_publisher.py
file.
It uses the IoT SDK from AWS to pass messages to the Nucleus, using
Inter-Process Communication
(IPC) to do so. This
library can be used to pass requests to the Nucleus, such as requesting a
message be published on a particular topic. The Nucleus checks that the
requester has enough permissions for the request before carrying it out.
The Recipe
This is the most important file of a Greengrass component. It is defined as
HelloWorld/recipe.yaml
in this repository, but it can also be defined in JSON. This file instructs the
core device on how to retrieve the software to run, how to unpack it, the
required configuration, and how to control its lifecycle.
For this component, the configuration includes two fields for the application:
Message: "World"
Period: 0.5
These are the default parameters, but can be overridden by a deployment. They tell the application what message to write and how frequently.
The component also has another YAML block to define its default access control:
accessControl:
  aws.greengrass.ipc.mqttproxy:
    com.mike.HelloWorld:pubsub:1:
      policyDescription: Publish and subscribe to any topic
      operation:
        - aws.greengrass#PublishToIoTCore
        - aws.greengrass#SubscribeToIoTCore
      resources:
        - "*"
This access control block allows the application to publish and subscribe to any
topic. This can also be changed in a deployment, which means that an
administrator can override this block to allow an application to be able to
publish on topic/test only, for example.
After the configuration is the manifests
block.
This defines all the system configurations that are acceptable to run the
component on. For this component, as it is written in Python, it can run on any
system; hence, there is only one entry with os: all
set.
The manifest defines the
Artifacts
as all the locations software must be downloaded from.
Artifacts:
  - URI: "s3://BUCKET_NAME/COMPONENT_NAME/COMPONENT_VERSION/HelloWorld.zip"
    Unarchive: ZIP
This block says to download the HelloWorld.zip file from an S3 bucket, which
must be accessible to the core device. The core device can then unzip the file
to get access to the Python files.
Finally, the lifecycle of the component is defined. This component has two lifecycle stages: Install and Run.
In the Install stage, it is set to create a virtual environment and install all dependencies into it.
In the Run stage, it is set to activate the virtual environment and run the main script using the configuration parameters set above.
For more options in the recipe file, take a look at the component recipe reference.
gdk-config.json
One last file to mention is the
gdk-config.json
file. This file defines how to use the Greengrass Development Kit
(GDK)
to build and deploy the component into the cloud.
Those are the most important files. If you want to see more complicated examples, take a look at the community components Github.
Summary and Challenge
This post showed the three main elements of Greengrass to understand. First, the management service, which tracks Core Devices and deploys software to them using Deployments, with each Deployment containing a list of Components to be deployed.
The post also showed how to set up a Linux device as a core device, demonstrating how to do so using a new Amazon EC2 instance. After setting up as a core device, we deployed a custom component to it and saw it producing logs and MQTT messages.
Finally, we looked at the anatomy of a component. A component is essentially a recipe file which defines default configuration and how to download, install, and run software for one or more target configurations.
Now that you understand Greengrass Concepts and Components, try to set up your own EC2 instance as a core device and deploy the custom component to it. Then change the configuration so that the printed message changes. If you can manage to do this, you'll have all the basics necessary to work with Greengrass yourself!
